Friday, October 30, 2009
Moving along
Well after that set back.. I decided to move to the other side of the camper (mostly because there was no floor to stand on)... This area took on water because the side seam was separated I figured I might as well get all the disappoint over at once... I am sure I will get an even bigger once the interior paneling comes off. Right now my garage it housing the guts of the trailer. I am still researching..... Here are a few pictures an video of the kids using their own innovation to take down a wall. That one had to be rebuilt anyway... We had to add a little humor to this project..
Digging deeper
Needless to say I began to research Camper Rehabs on the web, to see what others had encountered. Many people posted trials and tribulations of their experiences and this info was extremely helpful! Since I am home during the day, I put on some old clothes and a pair of gloves and started to take things apart. One thing I learned was the deeper you dig the more you will find. How True! I decided after about 2 hours ino this I really hate square drive screws with a passion. Guys with really small arms an mini drills put all these screws in just to piss me off. I figured the more space I cleared on the inside the easy it would be restore. So the kids an I worked together and out went the tub, the toilet, the bunks, the table, the cabinets.. When Mike got home we removed the water heater, the pump anything else that got in my way.. Now at this time we were only 3 days into this project. The weather had been less then favorable rain , rain and more rain. I just needed one day of no rain so I could get up on the roof with a heat gun to removed the nasty stuff around the vent and reseal it. At least that would be a start. The roof is in releavtively good condition. But for now we will continue to work from the inside out....So back to the floor...What I came to find I did not expect...We contnued to remove the rotten whatever it was on the floor hoping along the way we would eventually find dry anything. This was not the case. once we hit the foam insulation that that to was saturated when that came up so did the underbelly on the rv...It was very discouraging I was no standing on the outside ground from inside the rv....I didn't know wether to laugh or cry... Mike assured me that we would be able to put it back together I was very doubtful...Back to the web for more research.. Here a are pictures..
The interior
Cleaning up the Exterior
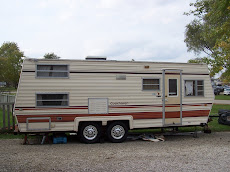
Once we got it home, it really looked like a piece of crap parked out in our drive so we decided to see if we could at least clean up the exterior and access the the outside structure. Still trying to decide where to begin..Once it was cleaned it looked a little more promising..Don't get me wrong some the seams in the corners were separated and you could see where the source of the leaks on the side of the aluminum shell.
Bring home our new project
This TT was a family owned camper that was used as extra sleeping space for the kids at Grandma & Grandpa's lake home. They spent many summers as children hanging out in their own little space. When they became teenagers and no longer went up to visit as often the camper began to deteriorate, the roof sprung a leak that went undetected from lack of use.My parents wanted the camper removed, it was to big and they could no longer take care of it. We had thought of giving it away. However, when we all went for a visit we decided to take a look inside to see exactly how bad it was and if we could restore it. Well the kids talked us into bringing it home and fixing it up, So initially our cost was $500 to replace the tires that were so badly dry rotted just to get it home. We were able to get it home but along the way the side canopy decide it no longer wanted to be attached an flew off..Thank god it was a on a side country road and the kids were far enough behind us and paying attention as it flew threw the air.
Subscribe to:
Posts (Atom)